Career Advancement for Medical Estheticians
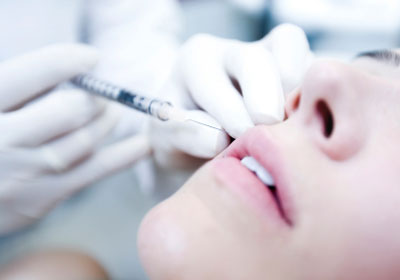
Awhile back I posted an aesthetician position on a local job search website. In my requirements, I had stated that only those aestheticians who have been trained in the proper use of laser technology should apply. I must have received over 100 resumes with barely a few who have ever laid their hands on a laser or even observed any procedures.

I selected a few resumes who I felt had years of experience and; therefore, would know the basic concepts of how skin reacts to laser light, Fitzpatick Skin Typing Scale, etc. I was surprised at how many of them had no idea how to answer what I was asking them.

It's obvious there are many skilled aestheticians out there seeking employment, or desiring to advance their career. I would highly suggest the Advanced IPL & Laser Training Course for Estheticians & Medical Spa Laser Technicians.

Advanced IPL & Laser Training Course is much more than knowing what the difference is between 532nm and 2940nm of light; or how different wavelengths affect blood, pigment and water; or even how laser light affects the stem cells of a hair shaft during the anagen growth phase. It's about broadening your knowledge of the aesthetic field, becoming a more valuable member to a medical aesthetic team, increasing your revenue by commission and upselling with your knowledge, and benefiting your patient by being able to explain various treatment options for them (some performed by you and other treatments by the physician). Even though you may not perform every treatment in a medical spa, such as injectable procedures or laser skin resurfacing, your knowledge of those procedures is very important in the patient advocate and educational process.

Even if you have no hands on training at this point, the Advanced IPL & Laser Training Course for Estheticians & Medical Spa Laser Technicians will lay down the foundation you need to secure a position in a medical spa. If one of the candidates had any understanding of some of the principles of laser technology, I would have brought them in for a personal interview with the physician. Hands on training is the easy part, the hard part is the theory behind laser technology.

Author: Paula D. Young RN runs internal operations and training at Young Medical Spa and is the author of the Medical Spa Aesthetics Course, Study Guide, and Advanced IPL & Laser Training course for medical estheticians and laser technicians.

Submit a guest post and be heard.

Medical Spa MD: Filler Injection Tips (Restylane, Juvederm)

Restylane, Juvederm and filler injections tips for physicians running medical spas and laser clinics.

The following is from a string of emails that were circulating among some of Medical Spa MDs Members. I've edited this somewhat to make it readable and get rid of all the extraneous copies. I'm also not displaying the identity or email addresses of the physicians in this thread.

Please leave your thoughts below as a comment.

Note: Some of the comments below might be out of order from the original thread. Emails' somewhat difficult to follow as a thread but you'll get the gist.

Filler Injection Discussion & Tips: Restylane | Juevederm | Evolence

1.  When I use the "push ahead" technique, I feel that I get better "plumping" per cc of filler.  I learned this from Kevin (thanks Kevin).
 
2.  When I use the "push ahead" technique, the filler fills a few millimeters in front of the needle tip.  You need to realize this to be able to put the material exactly where you want it.  Sometimes you have to "feel" the injection because you can't "see" the plumping.
 
3.  I mix 0.1 cc of lidocaine with epinephrine with my Juvederm.  This helps with bruising (epinephrine) and when the lidocaine goes away and the Juvederm attracts water, the two effects cancel each other and there is not as much enhancement after the injection due to the hydrophilic nature of the Juvederm.
 
4.  I use Juvederm Ultra under the eye and above the lip.  I use Juvederm UltraPlus everywhere else.
 
5.  I constantly complain to my Juvederm Rep about the 0.8 cc syringes.  I use lots of Radiesse because you get almost twice as much material for the same price.  Volume, volume, volume.  Please complain to your rep, maybe we can get them to change. 
 
6.  I hear the Evolence is very good.  We will be getting trained and start using it next month.


Thanks for the filler tips.Can you explain how you get the Lido with epi mixed into the Juvederm syringe? --PD


BD 1 ml Luer-Lok Syringe
 
This syringe allows you to get very precise amount of lidocaine (swish back and forth 20 times).
 
I use this syringe to put exaclty 1 cc of saline in my Botox Bottle. When I reconstitute the Botox (this gives it full strength per unit). The chances of intravascular injection might be lower with push ahead because the material will push the vessels out of the way as you advance --  Jeff


Hi Jeff,--I agree w/ #6.  I seem to get good augmentation, less redness, swelling and bruising with Evolence.  I use it for deeper fills in cheeks, NLF, etc.  Don't use it for lips or under eyes.  I do same with Lido w/ epi.  I tend to use Juvederm in lips.  Perlane / Restylane for other areas.  I agree w/ why Allergan uses 0.8 cc syringes. I've moved away from Radiesse.  I feel that the duration is not that much longer than a good correction with the HA's.  Besides, I believe a fair amount of the volume of Radiesse is a gel carrier, thus needing touch-ups at 2-3 months.  Perhaps that's why the went to the larger syringes? -- Don


The push ahead technique also moves small blood vessels out of the way, so you may notice less ecchymosis is overall pts. -- Greg


Jeff: --"Push ahead" has a higher risk of vessel cannulation & potential for vascular effects - skin necrosis in glabella, even potential for retro-grade flow to eye (causing visual loss).  I wouldn't recommend that technique for the periorbital area.

Restylane is recommended for the tear troughs;  it's less hydrophilic than juvederm - which means less post-treatment swelling.--Tom  --  [note from Jeff:  Tom is a plastic surgeon]


I would not use push ahead around the eye, I agree with Tom's comments. It works great for NLF. I was actually taught this by a PS -- Greg


Thanks Jeff for your kind comments. However I must make a few points in regards to fillers:
1) There are some areas that one has to still do the retrograde injection either b/c the purpose was to make a straight line (eyebrow lift and vermillion border and the bow-tie (the vertical lines connecting the base of nose and the upper lip border) AND when injecting the most inner 1/3 of the tear-trough to avoid risk of filler getting into the orbital space due to its close proximity to the orbital rim.
2) On the glabellar injection, it is best to first push and pull the needle thru the space underneath to break up the tissue before actually injecting the filler both in an anterograde and retrograde pattern
3) I ONLY use the 1/2 inch needles in all my injections
4) One can inject even Radiesse and/or Perlane via an 1/2 inch 30 gage needle. Why is this noteworthy to mention?? When I work on the lips and Marrionette's lines, I ususally first build the Vermillion border with Radiesse or Perlane (I get the best "lifting outcome" with heavier filler). I push the 1/2inch needle all the way forward then slowly and steadily inject while withdrawing (retrograde method). Then I re-evaluate how much of a correction I already get of the Marrionette' line and lifting up of the lip body. My next step is to inject into the most lateral lip section (about 1 cm distance) starting at the corner (using Perlane or Restylane or Juverderm). This time I inject slowly as I push forward (anterograde). Often I ended up correcting about 50% of the marrionette's line by going after the lip's border and most lateral body. Besides, the patient loveto see that they now could see their lip body all the way to the corner and more "smiley shape". The last step is the trickiest one, I use either Radiesse or Perlane on an 1/2 inch 27 gage needle. First placing my left thumb at the patient's lower half NLF's I retract the skin upward (about 2-3cm upward) then I approach my needle in an upward (vertical) position at about one centimeter lateral and one cm below the mouth corner of that same side. Then I aim diagonally toward the corner and start injecting anterograde just 1-2 mm below the imaginary horizontal line of the mouth corner (about 0.2 cc), then I withdraw the needle and reaim straight up and inject just below the horizonal line (0.2cc) then I do it one more time aiming diagonally outward (0.2cc). What was I attempting to do?? I was laying down a new flooring along the imaginary horizontal line. After the injection, release the left thumb. You will be surprised to see the retracted portion just rest right along this new floor, thus the Marrionette'line has been corrected. This is different from the common fanning technique of using the filler to "blow up" around the Marrionette's line. If you look carefully at those company's issued photos, the area around the Marrionette's line now appeared very swollen and puffed up. It is aesthetically unpleasant. It looked like the patient was beat up below the mouth. It reduced the profile of the chin.
5) For those of you that use fillers on the highly vascularized and shallow areas such as the temporal, crow's feet, undereye area lateral to the submalar area and along the lateral border of the cheek prominence (especially in those older skinny Caucasian ladies with much excessive very thin skin) I now emulate the same technique used in the hand. I would pinch to levitate the skin itself above the bony structure, then I bolus Restylane into the empty space. Then I massage it down. This elimates the risks of injecting into the vessels and nodules.


Interesting discussion.  So Kevin, how do you account for the difference in that anterograde injection you need less filler than in retrograde injections, assuming all else being equal?

Second, I am understanding one group claims anterograde injection carries a higher risk of vessel cannulation and possible intravascular injection, while another group claims that anterograde injection "pushes away" blood vessels, thus decreasing the risk. Not sure how anterograde increases risk of intravascular injection any more than retrograde.  If you push the needle ahead, transfixing a vessel, then begin injection, you can still conceivably deposit some material intravascularly, can you not?  Am I missing something here?

I also found an interesting idea of sub q bolus technique in areas of thin skin, ie crowsfeet, etc.  Anyone else try this method? ~ Don


Tom:

I do agree with you about those risks with anterograde injection. The key is always the skills in doing it, be it retrograde or anterograde. One always has to be very carefully doing anything around the eyes. However, the anterograde techinique has been advocated some of the best known experts such as Arnold Klein, MD and Kent Remington, MD. I also believed that the filler amount used was critical. It takes much more amount to get the same result with the often taught retrograde technique compared with the anterograde one. For example, I almost never required more than one full syringe in correcting bilateral NLF's vs what was typically used ( 2 syringes) by most others. I attached the before and after of a case wherein I used Readiesse to correct her NLF's and Marrionette's lines with anterograde technique. The after photo was taken right after. You can still see some of needle marks. I used one full 1.3 cc syringe, 1/2inch 30g for the Vermillion border and 1/2inch for NLF's and Marrionette's line. Notice also there was no "puffy/swollen look" medial to the Marrionette's line often seen with retrograde and fanning technique used by most others. ~ Kevin


All interesting comments.  The only place, I use “push ahead” is in the cheeks when doing them via the intra-oral route. (Apparently Radiesse is no longer teaching this method because may practitioners couldn’t get the hang of it but it works for me.)  I might try it in the “safe” areas such as NL folds.  We use only Radiesse and Juvederm and  I find that neither filler lasts as long as advertised in “first-timers”.  I’ve also had disappointing longevity in my older patients (>65) with both types fillers despite using numerous syringes.  I’m sure this has to do with their inability to generate collagen around the filler once the carrier gel is gone.  Does anyone know the age range of patients done in the filler studies? ~ SD


I came across this old thread way down in my inbox and read it again.  I’m not sure who wrote #4 below.  It sounds interesting but I’m having a hard time visualizing it.  Do you steadily move the needle forward  toward the lip edge as you are injecting or do you hold it in place while the area fills?  I’d love to see a drawing on where you start.  ~ SD


SD: I wrote those threads. The techniques that I described were similar to what you could see watching the video instruction on www.thederm.org by Kent Remington and his colleagues (lower face injection portion) THe only thing new from my thread was when fixing the Marrionette's line, his doctor (Nowell Solish) injection upward and anterograde from the lower part toward the lip corner only one time vs what I now do is I do the same thing but with a fanning pattern where (with the skin lifted about 1-2cm upward with the other thumb) I laid down "three such "anchoring points" along an imaginary horizontal floor starting from the lip corner going laterally for about 3-5cm long. Here I used something firmer such as Radiesse or Perlane. Having done this, you would release the thumb letting the skin go back down. Often you will see the Marrionetter's line is much improved because "part of that Marrionette's line" now is positioned along the horizontal flooring that you just created. ~ Kevin

PS: It is hard for me to send over some graphic illustration but I will attempt to do this in the future

Advanced Aesthetics Course: Understanding Injectables

Injectable products are an important contributing factor to your clinic's financial success. With new products entering the market like Dysport and Evolence, and other exiting like ArteFill, it is important that your staff be knowledgeable of the products used in injectable procedures.

Although this chapter from the Advanced Medical Aesthetics Training Manual wasn’t actually requested in the training manual I wrote for the academy students, I felt it was extremely important for , especially for medical estheticians, to know the difference amongst the various treatments used to alleviate the appearance of wrinkles and folds, and the difference between dynamic and static lines.

Medical estheticians have the most “face time” with clients, examining it with magnifying lenses, treating it with exfolliants, moisturizers, galvanic current, high frequency, various acids, etc. They understand the realm of fine lines and wrinkles and know what can be alleviated with topical treatments such as facials, peels, microdermabrasion and laser resurfacing, and what cannot.

I cannot tell you how many patients call or come into our office with no knowledge of the difference between paralyzing agents such as Botox and Dysport, and dermal fillers. We take it for granted that we know the difference, but injectable products can be very confusing to the lay person. Because the aesthetician works with the client’s skin, they should be well versed in the differences in the two categories of injectables and the products that lie within. Estheticians become your most powerful education source for your clients which ultimately leads to an upsell for them (with possible commission).

Many people think all fillers products are the same, nor do they care to understand the difference between hyaluronic acid or calcium hydroxylapetite. All they truly care about is “how long will it last” and will the “results look fake”. Only with proper education can the medical esthetician effectively and intelligently discuss the differences in the filler products, educate the patient about the effects and lasting results, and help lead the patient to the right product, or combination of products, for their expected outcome.

This information in this chapter is very important for your front desk/phone people as well!

Author: Paula D. Young RN runs internal operations and training at Young Medical Spa and is the author of the Medical Spa Aesthetics Course & Study Guide, and Advanced IPL & Laser Training course for medical estheticians and laser technicians.

Submit a guest post and be heard.

Medical Spa MD Training Courses

Finally available! The Medical Spa  MD Training Courses for Laser Clinics, Medical Spas, Plastic Surgery Centers and Cosmetic Dermatology Practices.

Your medical spa staff's knowledge and expertise is a critical componant to your medical spa or cosmetic clinic's success.

From IPL training to skin typing, Botox, Restylane, and Juvederm filler injections, the Medical Esthetician Training Manual & Study Guide, and the Advanced IPL & Laser Training for Non-physicians is required material for smart medial spas, plastic surgeons and cosmetic dermatologists.

Now it's easy to train every new hire on what non-surgical cosmetic proceedures you offer, how they work, and what alternatives there are. Ensure that your front desk, estheticians and laser technicians have the information that they need to answer patient questions with confidence.

For the first time, your laser clinic or medspa staff has the latest information on the newest nonsurgical medical treatments. From Botox, Restylane, and the newest filler injections, to fractional CO2 laser resurfacing, skin tightening and IPL treatments, now you have a uniform and tested training system. This is a must have for any serious cosmetic clinic.

Download Advanced IPL & Laser Training TOC
Download Medical Spa Aesthetics Training Course TOC


Advanced IPL & Laser Training Manual


The Advanced IPL & Laser Training Manual for Non-Physicians is required training material for every new hire working in a medical spa.

From IPL to fractional laser treatments, this manual covers the non-surgical IPL & Laser treatments your staff should know. Give your staff the information that will make you successful.

Advanced IPL & Laser Training - $227


Medical Estheticain Training Manual & Study Guide

 
The Advanced Medical Spa Esthetics Training Course & Study Guide is a two part learning cirriculum for non-physicians.

With 165 pages of quality content, this course is delivered in two parts that include a text book and a study guide. Already being used by leading medical spas and esthetician schools.

Medical Spa Aesthetics Training Manual & Study Guide - $247


Get all three and save: The Medical Spa Aesthetics Training Manual & Study Guide AND The Advanced IPL & Laser Training Manual

Buy the Medical Spa Aesthetics Training Course & Study Guide AND the IPL & Laser Training course and save almost $200!

 
Medical Spa Aesthetics Training, Study Guide, and Advanced IPL & Laser Training - $297


These training manuals are a critical component to the success of any Laser Center, Med Spa, Plastic Surgery or Cosmetic Dermatology practice. Use them to train every new medical spa staff member on what cosmetic proceedures are available, how they work, and what alternatives there are.

Written for non-physicians, both of these advanced training courses are already being used in leading medical spas and laser clinics to provide every new medical estheticians, laser techs, and front desk staff with current information about cosmetic information, and test their knowledge before they're hired.

Written by Paula D. Young, RN, these training manuals are designed to meet the real-world needs of cosmetic practices by those who know how to run a succesful cosmetic practice and how important it is that your staff is trained and has the information they need to become trusted avisors to your patients.

Everyone who has owned or run a med spa or cosmetic practice knows how long it takes to train new staff, and how much damage can be done with the wrong information. These new manuals and study course from Medical Spa MD make it easy to provide consistant, quality information to staff and ensure that everyone is on the same page from day one. Your entire staff now knows what your education expectations are and have the materials to meet them.

From Thermage to IPL to fillers and chemical peels, how they work, who they're for and when to use them. These courses give your laser techs, medical estheticians and front desk staff a deep understanding of the landscape of nonsurgical cosmetic medicine and save you endless hours of repetitive individual trainging. It's the single best investment you'll make in your medspa.

Give your staff the benefits of insider knowledge and make sure they're making the right decisions.